I can't find the Short Tips and Tricks thread currently, so I'm opening a new topic for this.
Just discovered this:
GCode tools Area extension (for engraving) does exactly the thing we've been looking for so often, and what we've been developing several tricks for, just automatically. Setting an exact value for the distance, however, is something I just don't understand (may be a bug).
To use:
1.
- Create a document in px units (in 0.91)
2.
- Create a path that is supposed to be the 'center path' of your outlines (the base object, e.g. a star)
- Create another path that is going to be the outer boundary of the area that you want to fill with the equally spaced outlines of the base object (e.g. a rectangle).
3.
- Subtract the first from the second.
4. (optional)
(you can leave this step out and just play around with 'area width' parameter later)
- To get the largest width that needs to be filled with outlines, convert the new path into an offset. Then, drag on its handle until the path is gone.
- Open the XML editor, look for the inkscape:radius attribute and copy its number
5.
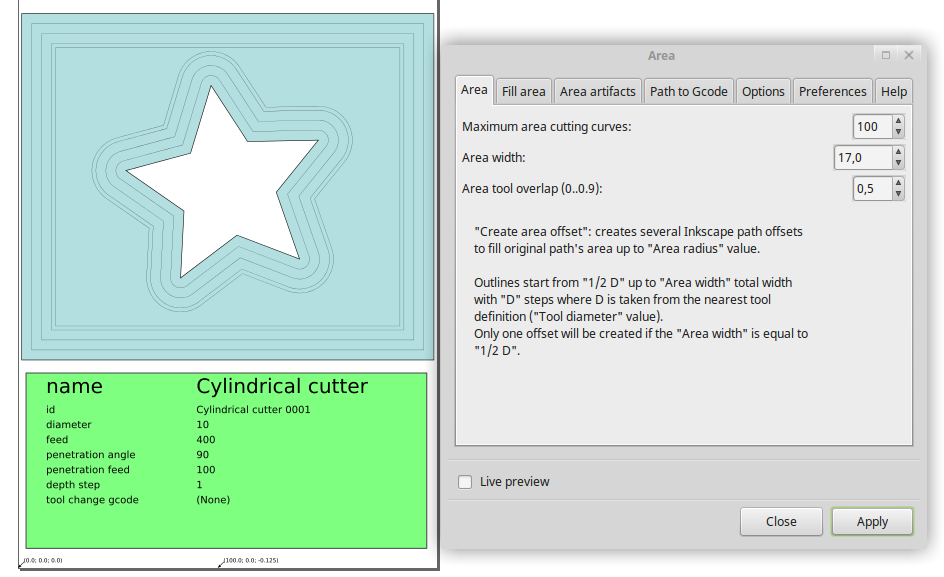
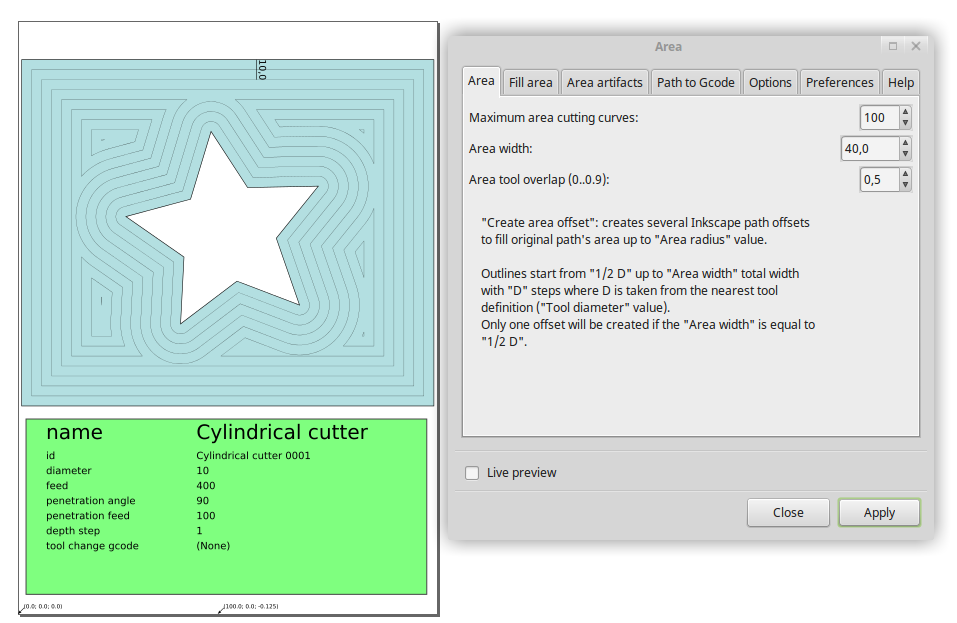
- In the GCodetools extension list, open 'tool library', choose 'cylinder', click apply.
- In the green box that has been created, enter a value for the double width of each of the automatically created outsets (unit appears to be mm) (In 0.92pre, the results appear unpredictable to me).
6.
- Open the GCodetools Area extension, and
- enter some value for the Area width (but it might work better if you just try out a few...)
- enter 0.5 for the overlap
7.
Select object and apply
You should now get a set of offset objects around your base object (star), that each have a distance of 5mm from the previous one. They have thin grey strokes, so if you want to see them well, set a different stroke color. Convert outsets to paths and break apart to be able to delete the lines you do not need separately.
Create equally spaced outsets easily
Create equally spaced outsets easily
- Attachments
-
- Bildschirmfoto_2016-06-11_16-17-43.png (91.69 KiB) Viewed 7238 times
-
- Bildschirmfoto_2016-06-11_16-21-02.png (100.58 KiB) Viewed 7238 times
Something doesn't work? - Keeping an eye on the status bar can save you a lot of time!
Inkscape FAQ - Learning Resources - Website with tutorials (German and English)
Inkscape FAQ - Learning Resources - Website with tutorials (German and English)