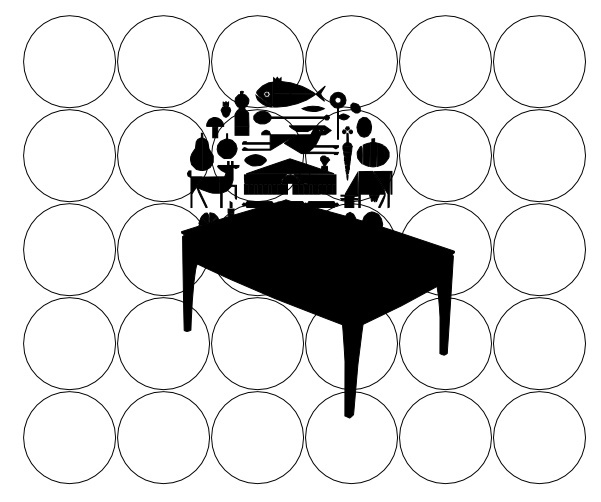
Hi i'm currently trying to have objects layered over a tessellation. However, because plotters and cutters cannot see fills all of my paths cross over each other.
An example can be found in the attachment. How can I make inkscape remove the lines underneath the black object?
I tried all path options like union and difference but these didn't work. Any suggestions on what to do?
Tiling the circles around the object would also suffice but my attempts in using the clone tiling trace function also didn't work.
How to layer objects over eachother?
How to layer objects over eachother?
- Attachments
-
- example.jpg (78.71 KiB) Viewed 4618 times

Re: How to layer objects over eachother?
It's not simple, but it sounds as if you don't mind doing a little work. basically, you have to use the top object to cut the bottom objects. To do this you need one of the boolean operations, and 'difference' would be the best and quckest. But first, since difference only works with two paths you have to select the circles that you want to cut and 'combine' them (path menu) so they are now one path. Put the shape that you want to cut with on top, and COPY it, because the difference operation uses it up. Then select both the combined path and the cutting path and do the difference. Next paste the path back in using 'paste in place' and you should have what you want. I hope the illustration makes the process clear. I have used a top shape that has a stroke only, and no fill, to help you see what's going on.

- rect4133.png (240.54 KiB) Viewed 4597 times
Your mind is what you think it is.