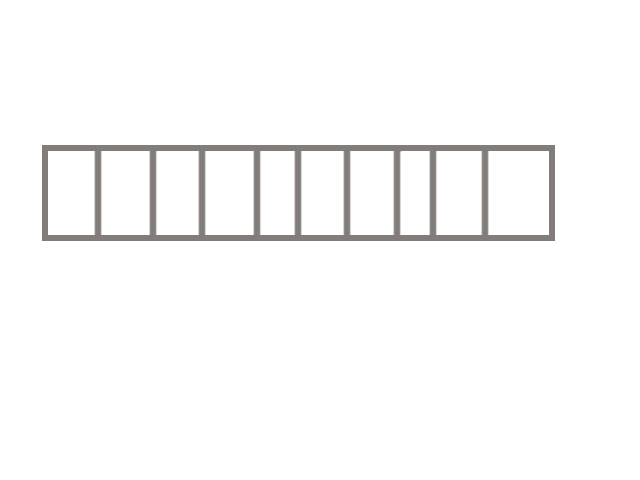
Here's one approach that should work, using the Align and Distribute dialogue to do the heavy lifting:
1) Draw your rectangle. While it's selected, copy it to the clipboard.
2) Draw a vertical line using

just above or below the rectangle - use the CTRL key to ensure it's vertical.
3) Edit > Paste Size > Paste Height to make your line the same height as the rectangle.
4) Duplicate your line 10 times, to give you 11 copies in total. You can simply press CTRL-D 10 times as one option.
5) Select the rectangle, hold shift and select one of the lines (check the status bar to see that you've got 2 objects of type Rectangle and Path).
6) Objects > Align and Distribute. Set the "Relative to:" popup to "First selected".
7) Click the "Align left edges" button (first row, second icon). Leave the dialogue open.
8 ) Select the rectangle and another line. Click the "Align right edges" button (first row, fourth icon).
9) Select all the lines, but not the rectangle, then click the "Distribute the centres equidistantly horizontally" button (in the Distribute section, second icon).
10) Delete the first and last lines to leave you with your 9 equally spaced vertical lines.
11) Select the rectangle first, then add all the lines to the selection.
12) Click the "Centre on horizontal axis" button (second row, third icon).
Do those steps one at a time, making sure you understand what's happening at each step, and I think you'll find that it's quite straightforward. There are ways to reduce some of the steps, but probably at the expense of clarity, so this is an instructional set of steps, not an optimal set.