Multiple offset strokes
-
Espermaschine

- Posts: 892
- Joined: Thu Jun 05, 2014 9:10 pm
Multiple offset strokes
How would you build this object with multiple offset strokes ?
- Attachments
-
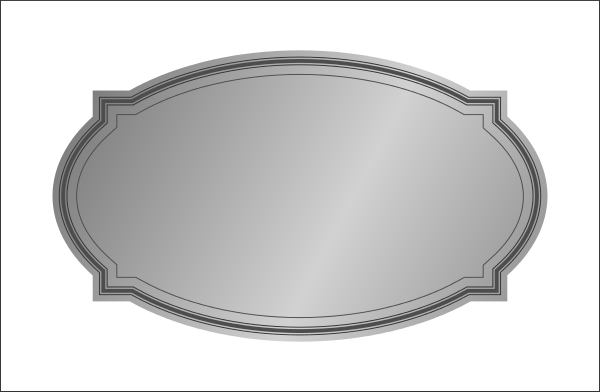
- MultiStrokes.png (44.14 KiB) Viewed 4682 times
Re: Multiple offset strokes
Depends on. What is the intended purpose?
You made the image so you know at least one way to draw it.
Personally I would prefer the result without any strokes at all.
But could draw it with clones, or could involve masking too.
If 3D shading would be the goal, then could draw it with markers and filtering.
Could draw it with a pattern along path lpe, or if it was a Thom's egg/basket handle shape -made of circles- could use gradients for the parallel lines.
Plain filtering could produce a close result too.
Gradient meshes can also work if you are patient with it.
There are a dozen ways.
Re: Multiple offset strokes
I think I would go with stroke-to-path (make a wide stroke, stroke to path, break apart, delete the one I don't need) to do the insets.
Dynamic offsets don't work as is needed in this case, creating rounded corners and asymmetric insets instead.
Dynamic offsets don't work as is needed in this case, creating rounded corners and asymmetric insets instead.
Something doesn't work? - Keeping an eye on the status bar can save you a lot of time!
Inkscape FAQ - Learning Resources - Website with tutorials (German and English)
Inkscape FAQ - Learning Resources - Website with tutorials (German and English)
Re: Multiple offset strokes
Hello,
Your question ticked me
So I tried some test with Live Path Effects, with results that doesn't fit with the example. Bend and Pattern along path produce deformation. Interpolate subpaths just can't be used for this task.
I haven't tried extensions.
Maybe a cloning with scaling? Someone could try...
Convert strokes to paths seems the best (and only?) option.
If you have problems:
1.- Post a sample (or samples) of your file please.
2.- Please check here:
http://tavmjong.free.fr/INKSCAPE/MANUAL/html/index.html
3.- If you manage to solve your problem, please post here your solution.
1.- Post a sample (or samples) of your file please.
2.- Please check here:
http://tavmjong.free.fr/INKSCAPE/MANUAL/html/index.html
3.- If you manage to solve your problem, please post here your solution.
-
Espermaschine
- Posts: 892
- Joined: Thu Jun 05, 2014 9:10 pm
Re: Multiple offset strokes
Okay, here's the story
I watched another Illustrator tutorial that shows how to make said object.
Apparently Illustrator does the offset stroke with an 'Effect', which i think is a filter.
To apply this filter, you have to 'Expand'. I think this action converts the filtereffect into paths.
When you later ungroup your finished drawing (grouping seems to happen automatically), everything is a single object.
I find this approach fascinating.
You can even apply multiple strokes.
In Inkscape this is a lot more modular. I cant apply several strokes, so i need to work with duplicates of the base object.
The problem is the offset. How do i shrink an object uniformly ?
As Moini pointed out, dynamic offsets are not an option because it produces rounded corners.
So i went with the 'strokes to path' - 'break apart' method which i call the Nick Method, because thats where i learned it first.
Yes, its a tricky challenge, isnt it ?
Well, just produce the shown drawing (without the gradient, that was just decoration)
Why ?
See, you have lots of ideas. Lets explore them so everybody can learn !
Can you draw us a few examples, please ?
I have no idea how to do any of your techniques.
I watched another Illustrator tutorial that shows how to make said object.
Apparently Illustrator does the offset stroke with an 'Effect', which i think is a filter.
To apply this filter, you have to 'Expand'. I think this action converts the filtereffect into paths.
When you later ungroup your finished drawing (grouping seems to happen automatically), everything is a single object.
I find this approach fascinating.
You can even apply multiple strokes.
In Inkscape this is a lot more modular. I cant apply several strokes, so i need to work with duplicates of the base object.
The problem is the offset. How do i shrink an object uniformly ?
As Moini pointed out, dynamic offsets are not an option because it produces rounded corners.
So i went with the 'strokes to path' - 'break apart' method which i call the Nick Method, because thats where i learned it first.
hulf2012 wrote:So I tried some test with Live Path Effects, with results that doesn't fit with the example. Bend and Pattern along path produce deformation. Interpolate subpaths just can't be used for this task.
I haven't tried extensions.
Maybe a cloning with scaling? Someone could try...
Yes, its a tricky challenge, isnt it ?
Lazur URH wrote:Depends on. What is the intended purpose?
Well, just produce the shown drawing (without the gradient, that was just decoration)
Personally I would prefer the result without any strokes at all.
Why ?
But could draw it with clones, or could involve masking too.
Could draw it with a pattern along path lpe, or if it was a Thom's egg/basket handle shape -made of circles- could use gradients for the parallel lines.
Plain filtering could produce a close result too.
There are a dozen ways.
See, you have lots of ideas. Lets explore them so everybody can learn !
Can you draw us a few examples, please ?
I have no idea how to do any of your techniques.
- Attachments
-
- Multiple Offset Strokes.svg
- (12.16 KiB) Downloaded 181 times
-
Espermaschine
- Posts: 892
- Joined: Thu Jun 05, 2014 9:10 pm
Re: Multiple offset strokes
OMG !
Thats a lot to digest
I just watched it once.
Interesting to see your workflow ! Never noticed the 'Remove Overlaps' before...
It seems some aspects of the video are just for demonstration purposes, right ?
Like the custom-coloured background and the custom-coloured guides ?
Building the ellipse from a polygon.
I will have to rewatch this a few times before i can summarize what your technique actually consists of.
Excuse me while i hit the sky.
Re: Multiple offset strokes
Adding custom background and guide colours/setting page size for a file more pleasant to look at.
It's not unusual to use a white fill, and finding that object over a white background is not that easy.
These are rough videos, not much planning, no editing whatsoever, just "improvising".
Stay tuned, more to come!
It's not unusual to use a white fill, and finding that object over a white background is not that easy.
These are rough videos, not much planning, no editing whatsoever, just "improvising".
Stay tuned, more to come!
Re: Multiple offset strokes
This one shows how to use gradient fills to follow a certain geometric shape:
https://www.dropbox.com/s/ahdooswao3g6gu9/f3.mp4?dl=0
-Note how using overlapping avoids rendering gaps of anti-aliasing.-
Talking about "rough" ideas, the gradient could be edited to have more steps -but you would need to adjust the three separate definition/snap handles right.
Can be done, but it is so much easier exporting it to png and adding a gradient map in gimp.
-
Espermaschine
- Posts: 892
- Joined: Thu Jun 05, 2014 9:10 pm
Re: Multiple offset strokes
Im still trying to figure out what you did in vid1.
You do something with clipping inside a group but its hard to see what....
But, that just gave me an idea:
its a potential technique to use the base shape with a white fill and a black, adjusted stroke as a mask to get an offset !
(although im not sure how this would be superior to the "Nick technique".)
This voodoo magic could be used as a bump-map in Gimp....
You do something with clipping inside a group but its hard to see what....
But, that just gave me an idea:
its a potential technique to use the base shape with a white fill and a black, adjusted stroke as a mask to get an offset !
(although im not sure how this would be superior to the "Nick technique".)
Lazur URH wrote:This one shows how to use gradient fills to follow a certain geometric shape:
https://www.dropbox.com/s/ahdooswao3g6gu9/f3.mp4?dl=0
This voodoo magic could be used as a bump-map in Gimp....
Re: Multiple offset strokes
^- which is basically the same as fediffuse.
Re: Multiple offset strokes
The next vid would be with pattern along path lpe that should be as using these gradiented shapes as clip objects but then I realised those shapes are messed up big time.
At the corner joins where the circular gradient should connect with the linear one, the "intersection line" should have a parabola shape instead of a straight segment...
Well, at least it can work. Investigating.
Edit: this one is related both to stitching gradients in a parabola intersecting line, and diffuse shading as well.
-
Espermaschine
- Posts: 892
- Joined: Thu Jun 05, 2014 9:10 pm
Re: Multiple offset strokes
My brain is melting already 
Could you perhaps upload the svg files for the first and second video, please ?!
Could you perhaps upload the svg files for the first and second video, please ?!
Re: Multiple offset strokes
Here it is corrected with gradients:

This -^svg^- can be used for clipping paths with pattern along path lpe-s to make up the framing.
Which would be the easiest on editing the spaces between the parallel lines.
This is how it looks gradient mapped:
This -^svg^- can be used for clipping paths with pattern along path lpe-s to make up the framing.
Which would be the easiest on editing the spaces between the parallel lines.
This is how it looks gradient mapped:
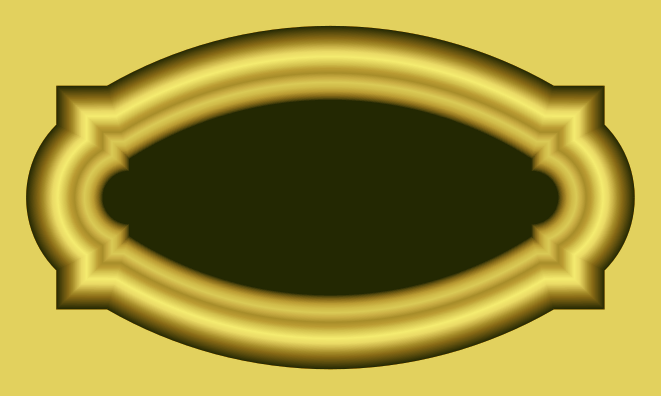
- f6.png (61.82 KiB) Viewed 4507 times
-
Espermaschine
- Posts: 892
- Joined: Thu Jun 05, 2014 9:10 pm
Re: Multiple offset strokes
@Lazur: can you see how many times your videos were downloaded ?
Re: Multiple offset strokes
No.
Can only see the attached svg's downloads and svg-s from openclipart.
Now that you mention it there seems to be "a way".
Can only see the attached svg's downloads and svg-s from openclipart.
Now that you mention it there seems to be "a way".
-
Espermaschine
- Posts: 892
- Joined: Thu Jun 05, 2014 9:10 pm
Re: Multiple offset strokes
Lazur URH wrote:No.
Can only see the attached svg's downloads and svg-s from openclipart.
Mmmh, just curious why your svg files were downloaded a whopping two times,
i mean we had two more interested people in this thread and you took the effort to make videos for "us".
Surely that should be rewarded with some attention ?
Re: Multiple offset strokes
Off topic:
Guess people don't appreciate what they have at their hand for free/no effort. Today I got inspired by Bartovan and joined society6.
Not a big fan of the concept of selling the same thing with wathever "art piece" added on top, like hot sauce on raw meat, yet I'm a step closer for trying it. Shouldn't be worse than the spec at 99designs.
-
Espermaschine
- Posts: 892
- Joined: Thu Jun 05, 2014 9:10 pm
Re: Multiple offset strokes
Lazur URH wrote:joined society6.
Hope you get rich !
Then you can grind mud with your platform boots into the new suede sofa.
Unity !
-
Espermaschine
- Posts: 892
- Joined: Thu Jun 05, 2014 9:10 pm
Re: Multiple offset strokes
I've watched the video several times and im unable to make anything out of it.
For example: when you build the ellipse, you convert the circle-segments into arcs, then delete the tip node, duplicate, and all of a sudden the tip re-appears and i have no idea what happened.
I do get the basic principle of building the ellipse from a polygon, but the video is confusing.
Same when it comes to the strokes building, its not clear why the color changed, what you clip, and what the general concept of this is.
I cant even figure it out after i look at the svg.
I see there is masking involved, but how you build the offset stroke, i have no idea.
Sorry to tell you, because you invested a lot of time into these videos.
Re: Multiple offset strokes
Getting back to it I see the black&white fade wasn't correct.
Missed that the function plotter was set with x start value of 1 instead of 0, which result in a slightly different shape...
Well here is an example constructed right:
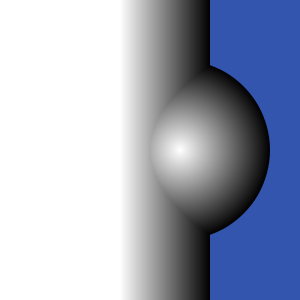


Missed that the function plotter was set with x start value of 1 instead of 0, which result in a slightly different shape...
Well here is an example constructed right:
-
Espermaschine
- Posts: 892
- Joined: Thu Jun 05, 2014 9:10 pm
Re: Multiple offset strokes
Lazur URH wrote:
This is really cool. So you are using the b/w gradient as a height map ?! (BTW, nothing seems to change when you remove colormatrix and composite...)
Its a bit like what i did here.
Re: Multiple offset strokes
Espermaschine wrote:
I've watched the video several times and im unable to make anything out of it.
For example: when you build the ellipse, you convert the circle-segments into arcs, then delete the tip node, duplicate, and all of a sudden the tip re-appears and i have no idea what happened.
I do get the basic principle of building the ellipse from a polygon, but the video is confusing.
Same when it comes to the strokes building, its not clear why the color changed, what you clip, and what the general concept of this is.
I cant even figure it out after i look at the svg.
I see there is masking involved, but how you build the offset stroke, i have no idea.
Sorry to tell you, because you invested a lot of time into these videos.
Thank's for the comment, will try to improve on it.
Didn't really invest much time in the video and probably a screen capturer that records the key combinations and mouse clicks would be more useful.
Or editing, some commentary.
Parallel strokes are the result of rendering duplicants of the same path with different stroke widths.
Starting from the outline of the overall shape, this results in offsetting in both direction, inside and outside of the core path,
thus the objects are grouped together and a clipping is applied.
Used black and white stroke colours as setting separate gradients for them is painful.
The ugliest part is selecting each one after another. This is not easy, relies on luck so to say. May an object browser come handy in the future.
So took an easy way around and grouped the black and white objects together, and used it as a masking object on a gradient filled rectangle. This way all the parallel lines could have the same looking fill. (Doesn't transfer right to pdf, but a quick trick for displaying purposes.)
Not sure about the tip part entirelly.
The actions at 4:16 can be confusing -tried snapping rotation center to node but the snapping failed.
-In order to scale the object proportionally from that point, holding Shift and dragging corner handle.-
Oh it was at 3:35. Just did an undo.
For stitching the arcs eventually they need to be open ones from the arc's starting and end points, yet for getting to a nice combination of scale/ratio between the three of them, I found it better to keep their origo for scaling.
The mentioned snapping problem comes out at 4:48 where after each scaling the object needs repositioning.
At 4:55 tried to capture how the ratio between the radiuses leads to a nicer curve.
Considered it "good to go" and unconnected the nodes at 5:16 just as they were before the undo at 3:35.