Welcome spock!
There might be a few different ways to do it, depending on your purposes -- Snap, Group objects, Combine paths or edit nodes.
Snapping is used to precisely position objects. So you could snap them together by enabling snapping on the Snap control bar (may be either along the right side of your Inkscape window, or across the top, depending on your version and your preferences). (
http://tavmjong.free.fr/INKSCAPE/MANUAL ... pping.html) But they won't stay together unless you do something else. If you move one, the other will stay behind.
Grouping them together will essentially make them one object. If you move one, the other moves with it. Yet, they still retain their own styles (color, stroke, etc.) (
http://tavmjong.free.fr/INKSCAPE/MANUAL ... roups.html)
If you want them to become all one path, all the same color and other style attributes, you'll have to edit the nodes. I could create a quick illustration for this if you need it. But basically you would remove (by breaking path) the 2 sides where they will be connected. Then Path menu > Combine. Then join the nodes at the top and bottom.
When you say this, it kind of gives me a clue what you're looking for.
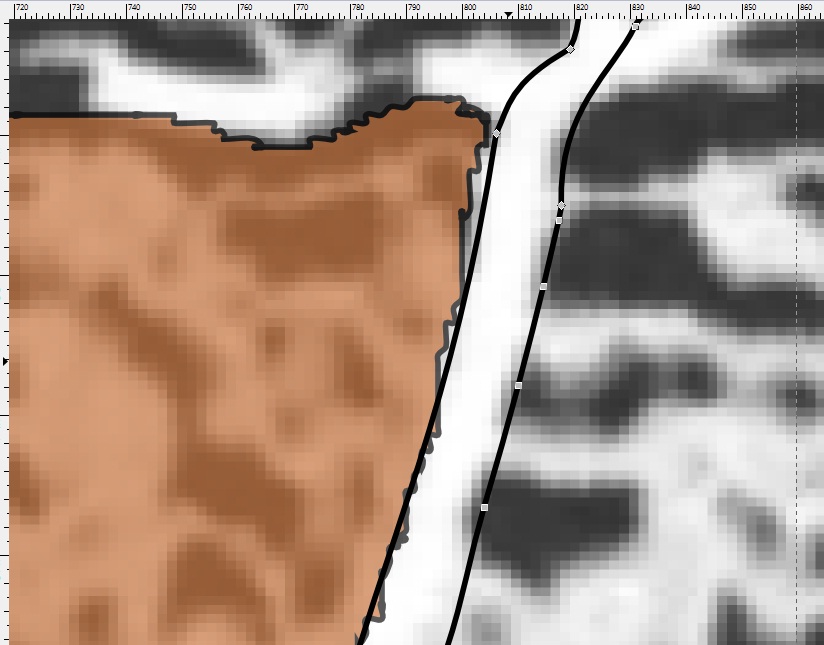
....so they have a common boundry (the orange object's boundry)....
The easiest way to accomplish this, would be to just move the orange object over top of the object on the right. Although it looks partially transparent, so that might not work. It sounds like you may be left with node editing, assuming I understand the question.
1 - Duplicate the orange object.
2 - With the Node tool

select the node at the top right corner and the node at the bottom right corner (holding Shift key). Then click "Break path at selected nodes" which is the 4th button from left on Node tool control bar.
3 - Path menu > Break apart
4 - Holding Shift key, click the path along the right side of the orange object, leaving the left part selected. Delete that left part.
5 - Break the path of the object on the right in the same manner. You may have to add new nodes to the right object, at the places where the duplicated portion of the orange object will be joined. Then break the path at those nodes. And then delete the portion that you will replace with the duplicated path from the orange object.
6 - Move the duplicated portion of the orange object into position with the object on the right using Selection tool

.
7 - Select the remaining portion of the right object and the duplicated portion of the orange object, then Path menu > Combine.
8 - Now you will see that the nodes at the top and bottom of the duplicated portion of the orange object should be very close to the open ends of the object on the right. Select the top node of the duplicated orange portion, and the top open end of the right object (use Shift) then click "Join selected nodes" which is the 3rd button from the left of the Node tool control bar. And do the same at the other end.
So now you have 2 objects, but the one on the right now has a portion which will fit exactly to the right side of the orange object, exactly like a puzzle piece! You can use snapping to make them align precisely together. I would suggest zooming in a bit, to help the snapping process connect the proper nodes. Set up the snapping toolbar with these buttons engaged, and all the others not. Enable snapping, Snap nodes and handles, Snap paths, Snap cusp nodes and Snap smooth nodes. Now since you're zoomed in, you can grab one object and move it towards the other, and you can see whether the proper nodes are snapping together. Because the path from the orange object is so squiggly, there will be many nodes. So it might be tricky getting the proper nodes snapped together. But the more you zoom, the easier it will be.
If you want them to both move together, you'll have to Group them. (Object menu > Group, or command bar button) If they both share the same style (color, etc.) you can use Path menu > Combine.
If I've misunderstood the question, please clarify