1 -- Move the text out of the way for now.
2 -- Select the ball
3 -- Path menu > Break Apart (makes all the paths separate)
Somehow, the circle has become broken. Notice the bottom-left node area there's a tiny open space there. So let's put that back together.
4 -- With the Node tool, select the circle. Drag a little selection box around both those nodes
5 -- Click Join Selected Nodes button, on the control bar (looks like this

)
As far as I understand, you want the text in the 3 large sections, and not where the stitching goes. So I'm going to continue with that goal.
6 -- Select the 4 curved paths which make the stitching area, with the Selection tool

7 -- Hold the Shift and Ctrl keys down, while you drag one of the corner arrows outward, just a tiny bit. We need to make them slightly larger than the ball
8 -- While they're still selected, Object menu > Raise to Top
Here's what it looks like now
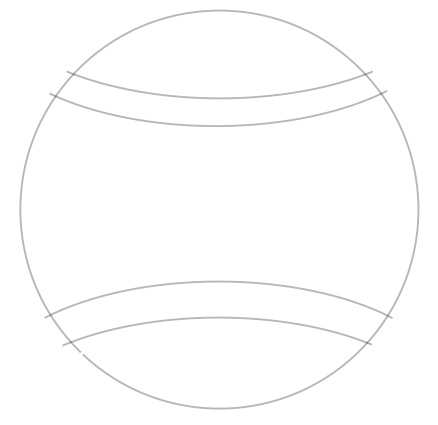
 b1.png
(16.05 kB . 438x425)
(viewed 334 times) 9 -- Create a new layer, by Layers menu > Add Layer. Give the new layer any name you want.
10 -- Using the Selection tool, drag a selection box around the circle and 4 curved paths
11 -- Duplicate
12 -- While everything is still selected, hold the Shift key while you click on some other color besides black. This will make the duplicates a different color, and help you not to be confused (because this will be a confusing process).
12 -- While those are still selected, hold Shift while you press Page Up key once. (This moves everything up to the new layer.)
13 -- You can either use the layer indicator in the status bar, or you can open Layers menu > Layers. But either way, click the tiny eye icon beside the new layer. This will hide that new layer and all its contents. Since you made the duplicates a different color, you can hide and unhide the 2 layers, to confirm that all the original black objects are in one layer, and the other colored objects are in the other layer.
14 -- In the original layer with the black paths, select the circle, hold Shift and select the top curved path
15 -- Path menu > Cut Path
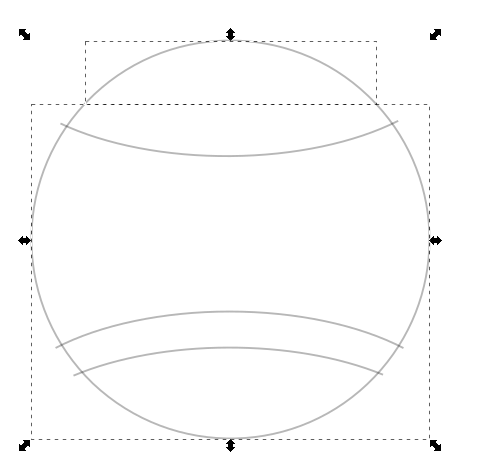
The curved path will disappear. But that's ok, because we saved duplicates in the hidden layer. Here's how it will look, right after step #15.
 b3.png
(16.49 kB . 477x468)
(viewed 361 times)Notice how there's a bounding box around the top section of the circle. (The bounding boxes are the dashed rectangles.) And a larger bounding box around the rest of the circle. That indicates they are in 2 separate pieces.
16 -- Select the bottom section of the circle, hold Shift while you select the top curved path
17 -- Path menu > Cut Path
Now you have this.
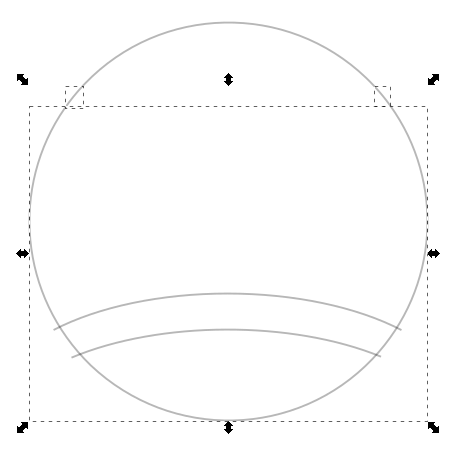 b4.png
(14.75 kB . 463x453)
(viewed 332 times)Notice the 2 tiny bounding boxes at the top.
18 -- Deselect everything, then select the 2 tiny pieces and delete them
19 -- Now try and repeat that process with the bottom 2 curved paths, and delete the tiny sections
When you finish, you should have this
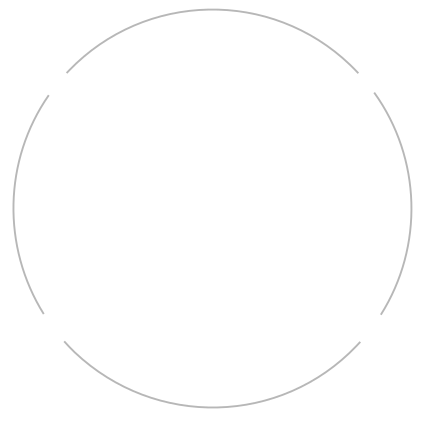 b5.png
(9.83 kB . 431x423)
(viewed 316 times)17 -- Hide that layer, and unhide the other layer
18 -- Select the 4 curved paths, and do Object menu > Lower to Bottom
19 -- Duplicate the circle
20 -- While circle is still selected, hold Shift and select the top curved path
21 -- Path menu > Cut Path
Even though that's the same command we used on the other layer, this time, we had the curved paths on the bottom and circle on top (opposite of before). So what this did was use the circle to trim off the curved paths in precisely the right place. Now you should see this:
 b2.png
(11.81 kB . 523x397)
(viewed 329 times)22 -- Delete the 2 tiny segments on the left and right sides
23 -- Repeat steps #19 through #22 for the other 3 curved paths
24 -- Select the 4 curved paths
25 -- Hold Shift while you press Page Down once (moves the 4 paths back down to the original layer
26 -- Hide this layer (which now should only have a circle in it), and unhide the layer below (the original layer)
Now, you finally have all the pieces you need, to put the 3 sections of the ball together. Here's what you should see:
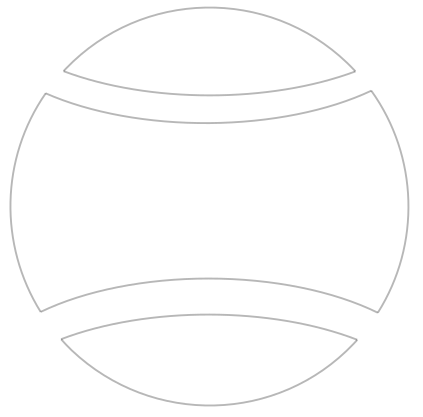 b6.png
(15 kB . 423x417)
(viewed 352 times)It looks perfect. But actually, it's all separate paths. They still need to be connected.
1 -- Using the Node tool

select the top section of the circle, and the top curved path
2 -- Drag a tiny selection box around the 2 nodes (which are right on top of each other) on the left side
Looks like this
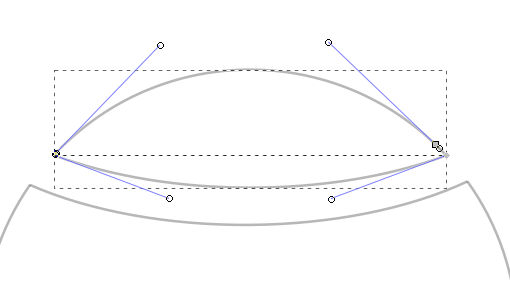 b7.png
(13.19 kB . 510x283)
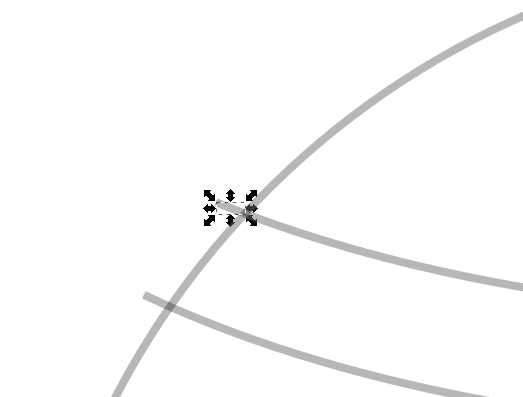
(viewed 352 times) 3 -- Click Join Selected Nodes button on the control bar
Looks like this
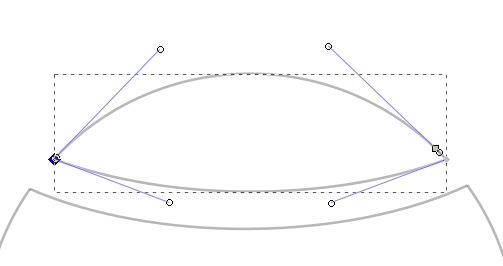 b8.png
(12.87 kB . 503x266)
(viewed 342 times) 4 -- Repeat for the right side
5 -- The bottom section of the circle will work just like the top one, meaning that you'll need to join nodes on the left and on the right.
6 -- For the middle section, you'll need to join nodes in 4 places, top left and right, and bottom left and right.
Now with all the nodes joined, you are ready to put the text inside each section. I'm guessing you'll need to divide the text up, so that it fits properly. Remember that you can adjust the size and font, to make it fit right.
Earlier, you had mentioned possibly making the text go in curved lines, like the stitches. That is possible to do, but I think you might have been asking that, so that the corners would get filled in. I think having these sections will allow the corners to get filled in. But if you still want to try curved lines, you can look into a feature called Text on Path. You would draw curved paths and apply the text to the paths. But you could only do it one path at a time. So a good deal more work. But it is possible.
Let us know how everything goes. Let me know if you get stuck with my instructions. It's a long and confusing process, so I might not have covered every little detail, or I might not have explained everything in the best way. But just let me know if you get stuck.
Edit
I forgot about the circle left over in the extra layer. If you don't want the row of stitches open on the ends, then just unhide that layer, and that extra circle will cover up the open ends.
Also, I noticed that all your original paths are partially transparent. You'll probably want to make those fully opaque. So when you're finished with everything, just Ctrl + A (select all) and whatever you did to make them transparent, do it the other way (if that makes sense).

